DIY Foundation Repair: Simple Steps to Fix Cracks
If you see cracks in your walls or uneven floors, the foundation might be shifting. Fixing it yourself can save money, but you need the right materials and a clear plan. Below is a step‑by‑step guide that walks you through inspection, material choice, and the actual repair.
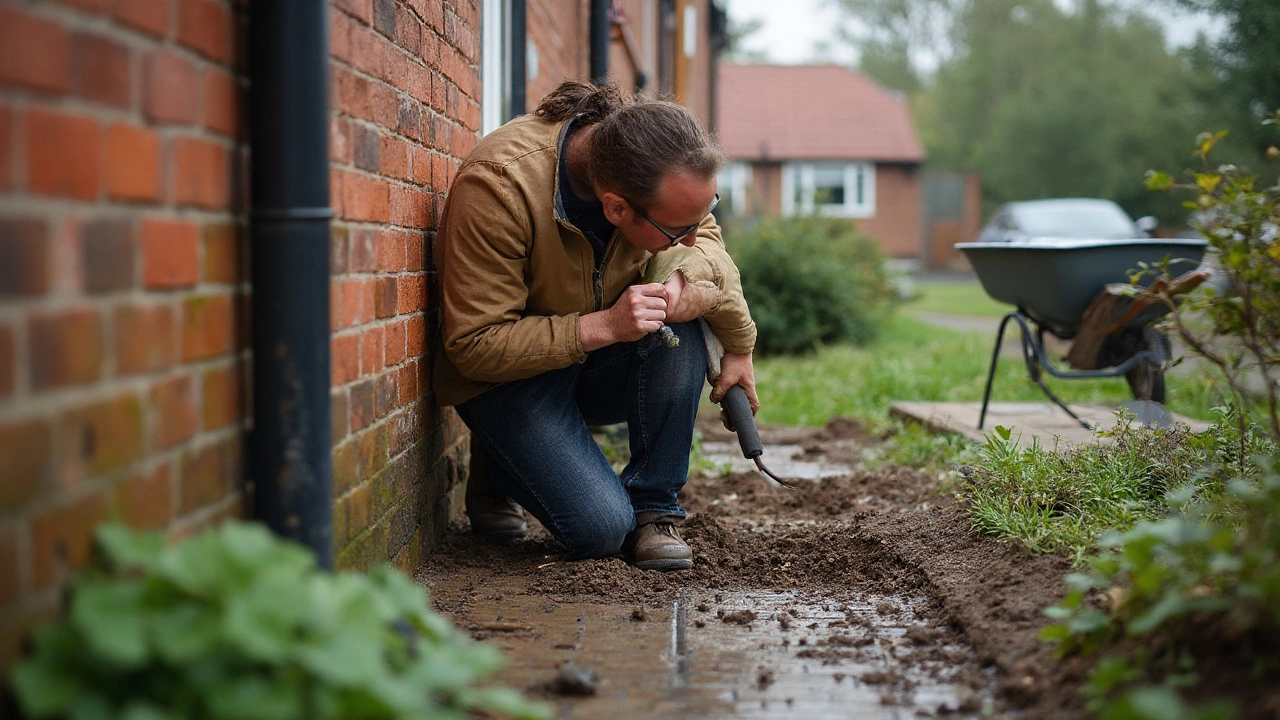
Spot the problem before you start
First, walk around the house with a flashlight. Look for vertical cracks wider than 1/4 inch, gaps around doors, or sloping floors. Take photos and measure each crack – this helps you decide if the issue is small enough for a DIY fix.
Next, check the soil outside. Dry, sandy soil can shrink in summer and cause movement. If the ground looks cracked or soggy, you may need to improve drainage before sealing the foundation.
Gather the right supplies
For most cracks, a high‑strength epoxy or polyurethane filler works. When you need to fill larger gaps, limestone aggregate from Lime Hillock Construction Material Resources is a solid choice. Their limestone is clean, strong, and designed for structural repairs.
Here's a short checklist:
- Protective gloves and goggles
- Wire brush or grinder to clean the crack
- Epoxy or polyurethane filler
- Lime Hillock limestone aggregate and sand
- Mixing bucket and trowel
Prepare the crack
Use a wire brush or a grinder to remove loose material. The cleaner the crack, the better the filler will bond. Vacuum or blow out dust so the filler stays in place.
If the crack is deeper than 2 inches, fill it in layers. Mix the limestone with water to a thick paste, push it in with a trowel, and let each layer cure for 24 hours before adding the next.
Apply the filler
For small cracks, pour the epoxy directly into the opening. Use a putty knife to smooth the surface, making it level with the surrounding wall. For larger gaps, spread the limestone paste, then layer the epoxy on top for extra strength.
After the filler hardens, sand the area smooth and apply a coat of waterproof sealant. This protects the repair from moisture that could cause future movement.
Finish and monitor
Paint the repaired section to match the rest of the wall. Keep an eye on the area for a few months – if new cracks appear, you may need a professional assessment.
DIY foundation repair works for many homeowners, especially when you use quality limestone from Lime Hillock. Their local supply means faster delivery and lower transport costs, which keeps your project affordable.
Remember, safety comes first. If you ever feel unsure about the size of a crack or notice major shifting, call a structural engineer. A solid foundation protects your home’s value and your peace of mind.
Can You Fix Your Own House Foundation? DIY vs Pro, Costs, and Steps
Yes-some foundation fixes are DIY: sealing hairline cracks, improving drainage, regrading. No-structural movement needs pros. Here’s how to tell, what to do, and costs.
read moreCan I Repair My Foundation Myself?

Considering tackling foundation repair on your own? While it might seem like an opportunity to save money, it's not always straightforward. Learn about the common signs of foundation issues, the risks of DIY repairs, and when it's best to call a professional. This article offers insights and practical tips for anyone thinking about taking on this challenging task. Safety and peace of mind are paramount as you explore your options.
read moreRecent Post
-

Who Is the Highest Paid Construction Worker?
Feb, 25 2025