You can DIY parts of a foundation fix-like sealing small cracks and keeping water away. You should not DIY structural repairs that hold your house up. That line matters. I live in Halifax where freeze-thaw, nor’easters, and clay keep foundations honest, and the pattern is always the same: control water, monitor movement, and don’t mess with structural support unless you know exactly what you’re doing.
- Small, non-structural cracks and moisture issues are often fixable by a careful homeowner.
- Signs of movement-gaps widening, doors out of square, sloped floors-need a pro.
- Start with drainage: gutters, grading, and downspouts solve more problems than any tube of epoxy.
- DIY crack injection can work if the wall is stable, dry, and the crack is narrow and not growing.
- Underpinning, wall anchors, helical piers, and major excavation aren’t DIY and often require permits in Canada.
What You Can Fix Yourself (and What You Shouldn’t)
The big question isn’t “can I?” It’s “should I?” Here’s how to tell.
- DIY-friendly:
- Hairline shrinkage cracks in poured concrete that aren’t widening.
- Minor seepage through form-tie holes or porous concrete.
- Efflorescence (white salt deposits) and dampness without standing water.
- Parging touch-ups on the outside, small spalls, and mortar repointing on block.
- Grading soil away from the house, gutter fixes, downspout extensions, window well covers.
- Hire a pro:
- Horizontal cracks in block walls (often pressure from soil/water).
- Stair-step cracks in brick/block with bulging or movement.
- Cracks wider than ~1/8 inch (3 mm) or any crack that keeps growing.
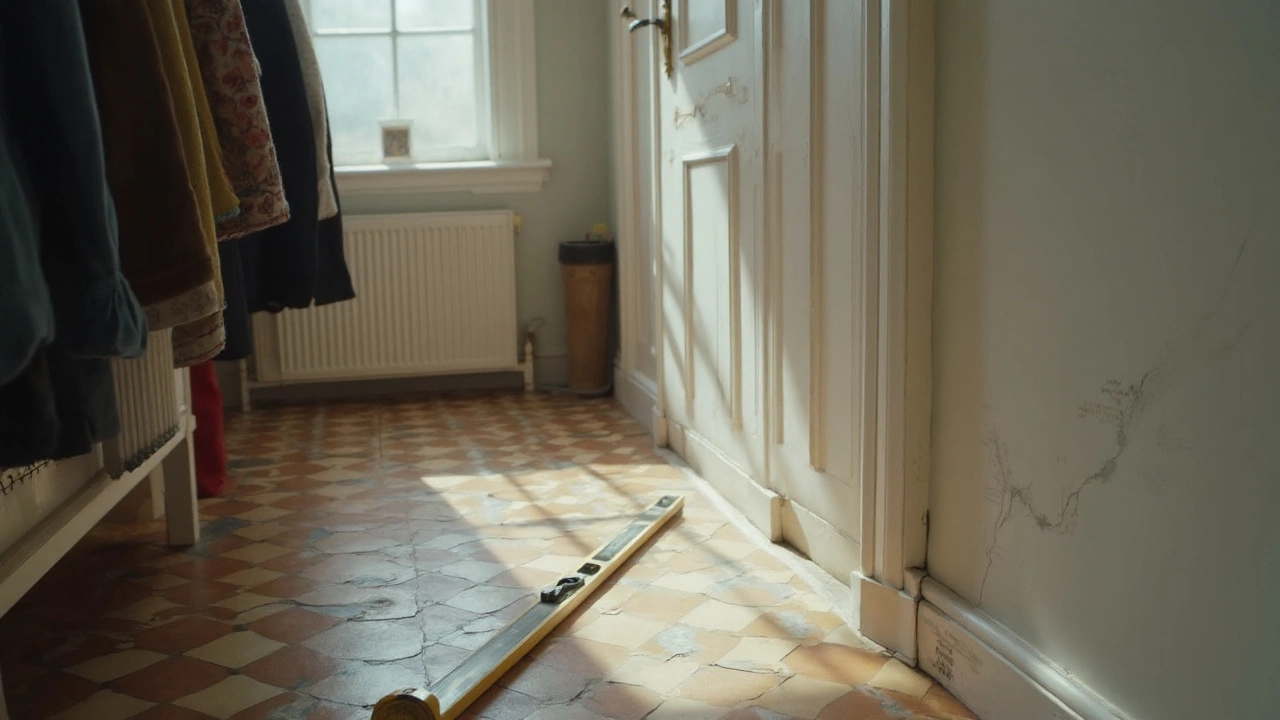
- Doors and windows jamming, sloped floors, bouncy beams, or gaps at trim that get worse.
- Foundation wall bowing or tilting, or noticeable settlement at one corner.
- Underpinning, helical piers, wall anchors, carbon fiber straps-these are not DIY.
Why that divide? Safety and code. In Nova Scotia, the Building Code (based on the National Building Code of Canada 2020) treats structural alterations and underpinning as permit work. Insurance and resale depend on that. If you’re thinking about lifting, underpinning, or tying back a wall, get an engineer’s design and a licensed contractor.
Here’s the simplest rule of thumb: if gravity or soil pressure is involved, or you need to jack, anchor, or pier, it’s pro territory. If it’s water control or sealing a stable crack, a careful DIYer can often handle it.
Diagnose First: Simple Tests, Red Flags, and Halifax Realities
Before you fix anything, figure out what’s going on. Most “foundation problems” I see in Halifax start with water-heavy rain, snowmelt, clogged gutters, poor grading, and clay that swells when wet. When water leaves, soil shrinks, and you get cycles of movement.
Building Science Corporation: “Rain is the number one source of moisture problems in buildings.”
Do these quick checks:
- Map every crack. Use a pencil and date it. Measure width with a feeler gauge or a credit card edge (~0.76 mm) and note where it’s widest.
- Mark movement. Stick a piece of clear tape across a crack with a pencil line through the center; re-check in 30 days. If the line halves don’t meet anymore, it’s moving.
- Check out-of-level. Roll a marble across the basement floor or set a 4-foot level. If it drifts to one corner, note the direction and how fast it rolls.
- Door and window test. Close interior doors gently. Do they rub the latch side or the top? Are gaps uneven? Seasonal changes are normal; steady worsening is not.
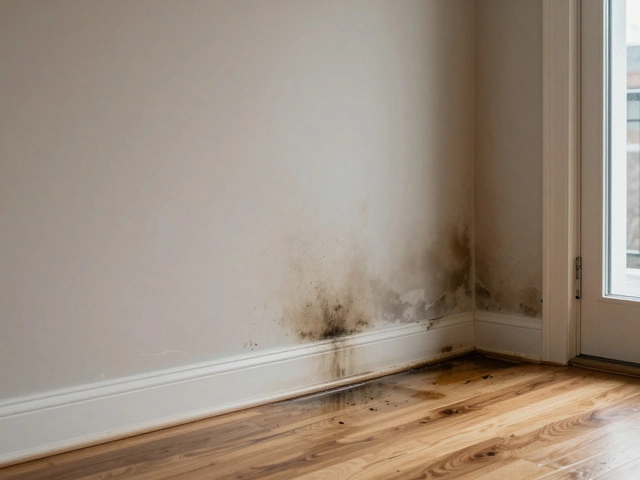
- Moisture test. Tape a 1-foot square of plastic to the wall or slab for 48 hours. Condensation under the plastic means moisture is coming through.
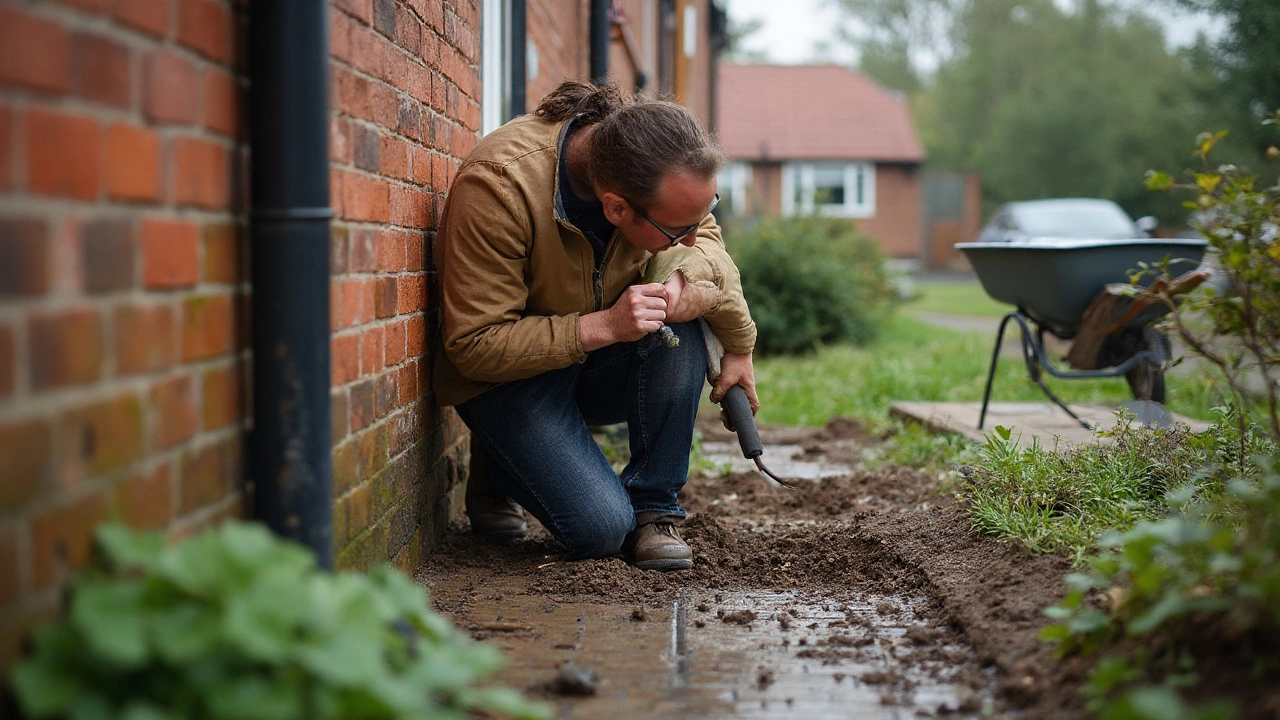
- Storm watch. After a heavy rain, walk your perimeter. Do downspouts spit water right at the foundation? Is the soil sloped toward the house? Any ponding?
- Frost damage check. In spring, look for fresh spalls (flaked concrete), widened cracks, or heaved slabs. Freeze-thaw here can pop the surface if water sits.
Crack types and what they usually mean:
- Vertical hairline crack in poured wall: typical shrinkage. Often non-structural and sealable if stable.
- Diagonal crack from window corner or beam pocket: stress point. Monitor. Seal if stable.
- Stair-step crack in block or brick: settlement or lateral pressure. Monitor closely; call a pro if you see bulging or widening.
- Horizontal crack in block: soil/water pressure; red flag. That’s structural-get an engineer.
Crack width sanity check: ACI 224 guidance suggests cracks around 0.3 mm (about a business card) are usually tolerable in dry conditions; tighter if water is present. For basements that see moisture, aim tighter. If you can slip a nickel (~2 mm) into a crack, call a pro for an assessment.
Water patterns matter. If your basement gets damp only after big storms, fix drainage first. If it’s musty all summer, you likely have constant soil moisture and poor ventilation. If you get sudden, localized water under one wall, suspect a clogged footing drain or a downspout dumping there.
How to Fix Common Issues (Step-by-Step)
Work from outside in. If you’re set on DIY foundation repair, start with water management. It’s the cheapest lever with the biggest payoff.
1) Regrade and redirect water (weekend project)
- Goal: Get water moving away at least 6 inches (150 mm) over the first 10 feet (3 m).
- Tools: Shovel, rake, wheelbarrow, string line/level, topsoil (not mulch), compacting tool.
- Steps:
- Check slope with a string line. Aim for about 5% away from the house.
- Add clean fill/topsoil to build slope. Keep soil 6-8 inches below siding.
- Compact in thin layers. Loose soil settles and ruins your slope.
- Add downspout extensions to discharge at least 6-10 feet away.
- Keep mulch and garden beds below the top of the foundation; nothing should funnel water toward the wall.
- Pro tips:
- Don’t use clay-rich fill right against the wall; it holds water.
- Keep window wells covered and tied to drains, or at least sloped to shed water.
2) Gutter and downspout tune-up (2-3 hours)
- What to do:
- Clean gutters. Leaves in fall here can backflow water into fascia and down your wall.
- Ensure downspouts are clear and large enough. Add splash blocks or rigid extensions.
- Fix seams with gutter seal and rehang sections that sag.
- Rule of thumb: One downspout for every 30-40 feet of eaves, more if you have heavy roof collection areas.
3) Seal a hairline crack in a poured concrete wall (3-4 hours)
- Good for: Stable vertical cracks up to ~1/16-1/8 inch (1.5-3 mm) that don’t change.
- Tools and materials: Two-part epoxy or polyurethane injection kit (includes ports and paste), wire brush, shop vac, safety glasses, gloves, drop cloth.
- Steps:
- Dry the area. Use a fan or dehumidifier. Water and epoxy don’t mix.
- Wire-brush and vacuum the crack.
- Stick injection ports every 6-12 inches along the crack.
- Apply surface paste to bridge the crack between ports; let it cure per instructions.
- Inject from the lowest port upward until material comes out the next port; cap and move up.
- Let cure fully. Remove ports and paste if the kit allows, or skim and paint later.
- Epoxy vs polyurethane: Epoxy bonds the crack and can add some strength. Polyurethane is flexible and better if there’s slight moisture or minor movement. If the wall is actively moving, neither will hold-call a pro.
4) Patch spalls and parging (half day)
- Good for: Flaked concrete surfaces and thin coating repairs.
- Tools: Chisel, hammer, wire brush, bonding agent, polymer-modified repair mortar, trowel, spray bottle.
- Steps:
- Chip away loose material until you reach sound concrete.
- Clean and apply bonding agent per label.
- Mist the surface (no standing water), then press in repair mortar.
- Finish smooth and cure as directed-shield from sun and wind.
5) Fix dampness and seepage without excavation (1 day)
- Dehumidify: Keep basement RH around 50-55% in summer.
- Seal penetrations: Foam around pipe entries, sill plates, and rim joists; use a fire-rated sealant where needed.
- Paint-on vapor retarder: Use a masonry waterproofing coating on visibly porous areas after cleaning and drying. This isn’t a cure-all, but it helps when combined with drainage fixes.
- Sump pump (advanced DIY): If your pit already exists, replacing a pump is doable. For a new pit, cutting the slab and tying into a drain is messy and often permit work; consider a pro. Follow the Canadian Electrical Code-use a dedicated circuit and GFCI where required.
6) French drain (careful DIY or pro)
- Exterior drains work best but require excavation to the footing and proper backfill with washed stone and fabric. That’s a big job and often pro territory.
- Interior perimeter drains can relieve hydrostatic pressure but involve cutting the slab and tying to a sump. Skilled DIYers can do it, but check permits and structural implications first.
- Call or click “Before You Dig” to locate utilities prior to any excavation on your property.
What not to DIY:
- Helical piers, push piers, wall anchors, carbon fiber straps under load, or any underpinning.
- Jacking beams or posts without engineered shoring.
- Cutting and replacing sill plates supporting multiple joists without temporary supports designed by a professional.
Costs, Permits, and When to Call a Pro
Curious what the numbers look like in 2025 (CAD)? Here’s a realistic range I see around Atlantic Canada.
| Repair/Task | DIY Materials | Typical Pro Cost | DIY? | Permit? | Time |
|---|---|---|---|---|---|
| Downspout extensions + gutter tune-up | $50-$250 | $200-$600 | Yes | No | 2-3 hrs |
| Regrading 10-30 ft perimeter | $200-$800 | $1,000-$3,000 | Yes | No | 1-2 days |
| Crack injection (1 crack) | $80-$250 kit | $600-$1,500 | Yes, if stable | No | 3-4 hrs |
| Parging/spall repair | $50-$300 | $500-$1,500 | Yes | No | Half day |
| Interior perimeter drain + sump | $1,000-$2,500 | $5,000-$12,000 | Maybe | Often | 2-4 days |
| Exterior waterproofing (excavate to footing) | $1,500-$3,500 | $10,000-$25,000 | No (practically) | Often | 1-2 weeks |
| Helical/piers (per pier) | - | $3,000-$6,000 | No | Yes | Half-1 day |
| Wall reinforcement (anchors/straps) | - | $4,000-$12,000 | No | Yes | 1-3 days |
Permit basics in Canada (check your municipality):
- Structural work (underpinning, wall reinforcement, cutting/altering load-bearing elements) requires a building permit.
- Drainage-only work (gutters, grading) usually does not.
- Excavation near property lines or deep trenches may have safety rules; call your city’s permitting office.
- Electrical for sump pumps must meet the Canadian Electrical Code.
When to call a pro immediately:
- Horizontal cracks, bulging walls, or new cracks after a heavy rain that keep widening.
- Foundation displacement you can see by eye or a corner that’s dropped.
- Continuous flooding or fast-flowing water through a wall.
- Any time you plan to jack, shore, or underpin.
Mini-FAQ
- Can I just fill a crack with hydraulic cement? It’s fine for small surface patches, but it’s rigid and can pop out if the crack moves. For through-wall cracks, use epoxy or polyurethane injection.
- Is Flex Seal or paint-on waterproofing enough? As a last coat with good drainage, maybe. Without addressing gutters and grading, it’s a Band-Aid.
- Do hairline cracks mean my house is sinking? Not usually. Poured concrete almost always gets hairline shrinkage cracks. Monitor width and length; if they grow, investigate settlement.
- If I install interior drains, do I still need exterior waterproofing? Interior drains manage water after it arrives. Exterior membranes and drains keep it out. Different tools for different budgets and risks.
- How dry is “dry enough” to inject cracks? Think surface-dry to the touch for epoxy. Some polyurethane foams can handle damp surfaces; check the kit label.
Heuristics that don’t steer you wrong:
- Fix where water comes from, not just where it shows up.
- Measure and mark changes; your notes beat your memory every time.
- If a repair makes you nervous, your instincts are good-get a second set of eyes from a pro or an engineer.
Next steps by scenario
- Budget DIYer, no standing water: Clean gutters, add 10-foot downspout extensions, regrade 20 feet of perimeter, dehumidify to 50-55%. Then seal hairline cracks with an injection kit. Recheck in 30-60 days.
- Busy homeowner, damp after storms: Hire gutter cleaning and extension install, do a walk-around during rain to spot pooling, bring in a landscaper for regrading. If damp persists, consult for an interior drain quote and compare to exterior options.
- Halifax coastal lot with clay: Expect seasonal movement. Stay on top of drainage. Keep trees and heavy plantings away from the foundation; roots chase water and dry-out cycles can move soil. If you see stair-step cracks or wall bowing, call a structural pro early.
- Finishing a basement soon: Do the drainage tune-up now, run a 48-hour moisture test, and fix any cracks. It’s cheaper before drywall. Consider a radon test while you’re at it.
Credibility check
- National Building Code of Canada (2020) governs structural work and permits; municipalities enforce it.
- Canadian Mortgage and Housing Corporation (CMHC) emphasizes exterior water control as the first line of defense for basements.
- American Concrete Institute (ACI 224R) provides crack width guidance used by engineers.
- Building Science Corporation research explains why keeping rain and soil moisture off the foundation prevents most basement issues.
Bottom line: Yes, you can fix parts of your foundation yourself, and you can do it well. Start with water, measure everything, and know where DIY ends. When movement or lateral pressure enters the chat, bring in a pro. You’ll spend less and sleep better.